Hi All!
I am finally ready to post my review of the Cashmerette Sewing Workshop that I "recently" attended. Yes, the workshop was nigh on three months ago BUT I have only recently finished the items that I started working on that weekend. I figure I can't fully review the thing until I have sewn up the clothes and discovered how they turned out...
Before I get into how the workshop was structured and what I liked / didn't like, I have to say the most amazing thing about this workshop was the people. Jenny and Carrie created an open environment with a genuine approach of body positivity. This is so rare in our usual world that there were people in tears of relief that they were allowed to just make themselves something that fit without judgement.

The workshop appealed when I saw it advertised for a range of reasons. There were small numbers (I think 7-8 of us, plus Jenny and Carrie) and one of the main drawcards for me is that there was NO set agenda! You could literally come to make a single full garment from scratch, diagnose fit issues on existing made items, or somewhere in between. This was perfect for me, as I really wanted actual fit advice rather than an in-person sewalong which tend to be more about sewing for that garment (only).
The format was simple - a bit of a chat, then we all started doing whatever we wanted to do - with lots of help from Jenny and Carrie. The doing continued until Jenny called us together to demonstrate a particular adjustment or technique.

The things she demonstrated were either directly related to what one or more of us were working on at that time (i.e. a practical example on something being made on the day), or they were things we expressed an interest in (i.e. someone asked about doing full bicep adjustments so it was covered using an example sleeve pattern piece).

This was a great mix of learning things "on the job" and in a more theoretical sense. We were also given the option to not care about the demo and just carry on sewing, which was fantastic when the adjustment wasn't relevant to our bodies, or we were in the sewing zone.
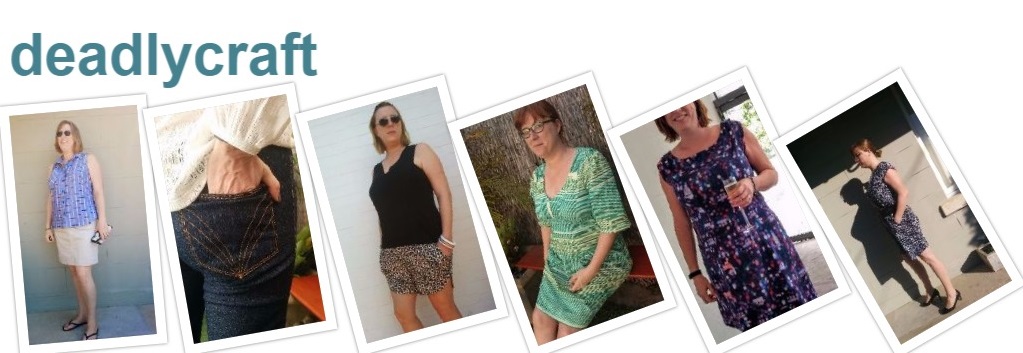
I worked on a muslin pair of Ames jeans, which I started from scratch. I got great advice from Jennie on which size and pelvis to select. I adjusted the pattern as agreed and then cut out and rough-sewed the pants during day one.

My muslin is bottom left (I didn't bother doing a full leg on the right, as you can see). I was able to then cut these out of the "good denim" during the workshop.
I finally finished these a couple of weeks ago and I love them. The fit is pretty perfect - they are super comfortable and also look great. They could be a smidge longer but otherwise I am very happy.

On day two, I worked on the Harrison shirt which I had already cut out as a muslin, but wanted to sew up and get any tips on adjusting the fit.
I got some extra help from Carrie on where to adjust both patterns in terms of additional length which will be helpful for my next version of this shirt, as well as a demo of how to do a full back adjustment from Jenny.

I like this pattern very much and the fit is pretty good. However the pattern on this fabric is off grain - which drove me nuts cutting it out and I can see it in the finished product. I will still wear this (I like the colour and pattern) and am still overall quite happy.

I got a lot from the workshop and would recommend it to others. The help with fit was fantastic and I have two great garments as a result of the two days. I would also say these are likely to end up being TNT patterns because I am so much closer to the perfect fit than I would have been had I made these on my own outside of the workshop.
Getting to spend time with Jenny, Carrie and the fantastic group of women who were at the workshop was also immensely enjoyable. The atmosphere was supportive and fun, and there is nothing more lovely than seeing people grow in confidence and learning from each other.
So that's a very belated review of the workshop - I would say go for it if you get the chance, and I am on the list if and when the Cashmerette team come back to Australia!
I am finally ready to post my review of the Cashmerette Sewing Workshop that I "recently" attended. Yes, the workshop was nigh on three months ago BUT I have only recently finished the items that I started working on that weekend. I figure I can't fully review the thing until I have sewn up the clothes and discovered how they turned out...
Before I get into how the workshop was structured and what I liked / didn't like, I have to say the most amazing thing about this workshop was the people. Jenny and Carrie created an open environment with a genuine approach of body positivity. This is so rare in our usual world that there were people in tears of relief that they were allowed to just make themselves something that fit without judgement.

The workshop appealed when I saw it advertised for a range of reasons. There were small numbers (I think 7-8 of us, plus Jenny and Carrie) and one of the main drawcards for me is that there was NO set agenda! You could literally come to make a single full garment from scratch, diagnose fit issues on existing made items, or somewhere in between. This was perfect for me, as I really wanted actual fit advice rather than an in-person sewalong which tend to be more about sewing for that garment (only).
The format was simple - a bit of a chat, then we all started doing whatever we wanted to do - with lots of help from Jenny and Carrie. The doing continued until Jenny called us together to demonstrate a particular adjustment or technique.

The things she demonstrated were either directly related to what one or more of us were working on at that time (i.e. a practical example on something being made on the day), or they were things we expressed an interest in (i.e. someone asked about doing full bicep adjustments so it was covered using an example sleeve pattern piece).

This was a great mix of learning things "on the job" and in a more theoretical sense. We were also given the option to not care about the demo and just carry on sewing, which was fantastic when the adjustment wasn't relevant to our bodies, or we were in the sewing zone.
I worked on a muslin pair of Ames jeans, which I started from scratch. I got great advice from Jennie on which size and pelvis to select. I adjusted the pattern as agreed and then cut out and rough-sewed the pants during day one.

My muslin is bottom left (I didn't bother doing a full leg on the right, as you can see). I was able to then cut these out of the "good denim" during the workshop.
I finally finished these a couple of weeks ago and I love them. The fit is pretty perfect - they are super comfortable and also look great. They could be a smidge longer but otherwise I am very happy.

I got some extra help from Carrie on where to adjust both patterns in terms of additional length which will be helpful for my next version of this shirt, as well as a demo of how to do a full back adjustment from Jenny.

I like this pattern very much and the fit is pretty good. However the pattern on this fabric is off grain - which drove me nuts cutting it out and I can see it in the finished product. I will still wear this (I like the colour and pattern) and am still overall quite happy.

I got a lot from the workshop and would recommend it to others. The help with fit was fantastic and I have two great garments as a result of the two days. I would also say these are likely to end up being TNT patterns because I am so much closer to the perfect fit than I would have been had I made these on my own outside of the workshop.
Getting to spend time with Jenny, Carrie and the fantastic group of women who were at the workshop was also immensely enjoyable. The atmosphere was supportive and fun, and there is nothing more lovely than seeing people grow in confidence and learning from each other.
So that's a very belated review of the workshop - I would say go for it if you get the chance, and I am on the list if and when the Cashmerette team come back to Australia!
Comments
Post a Comment